User guide
This page walks through the main screen and the everyday actions. The more specialised tasks have their own pages: Enum, Link and Array, Edit Children, Importing data, Creating master data and Modifying data.
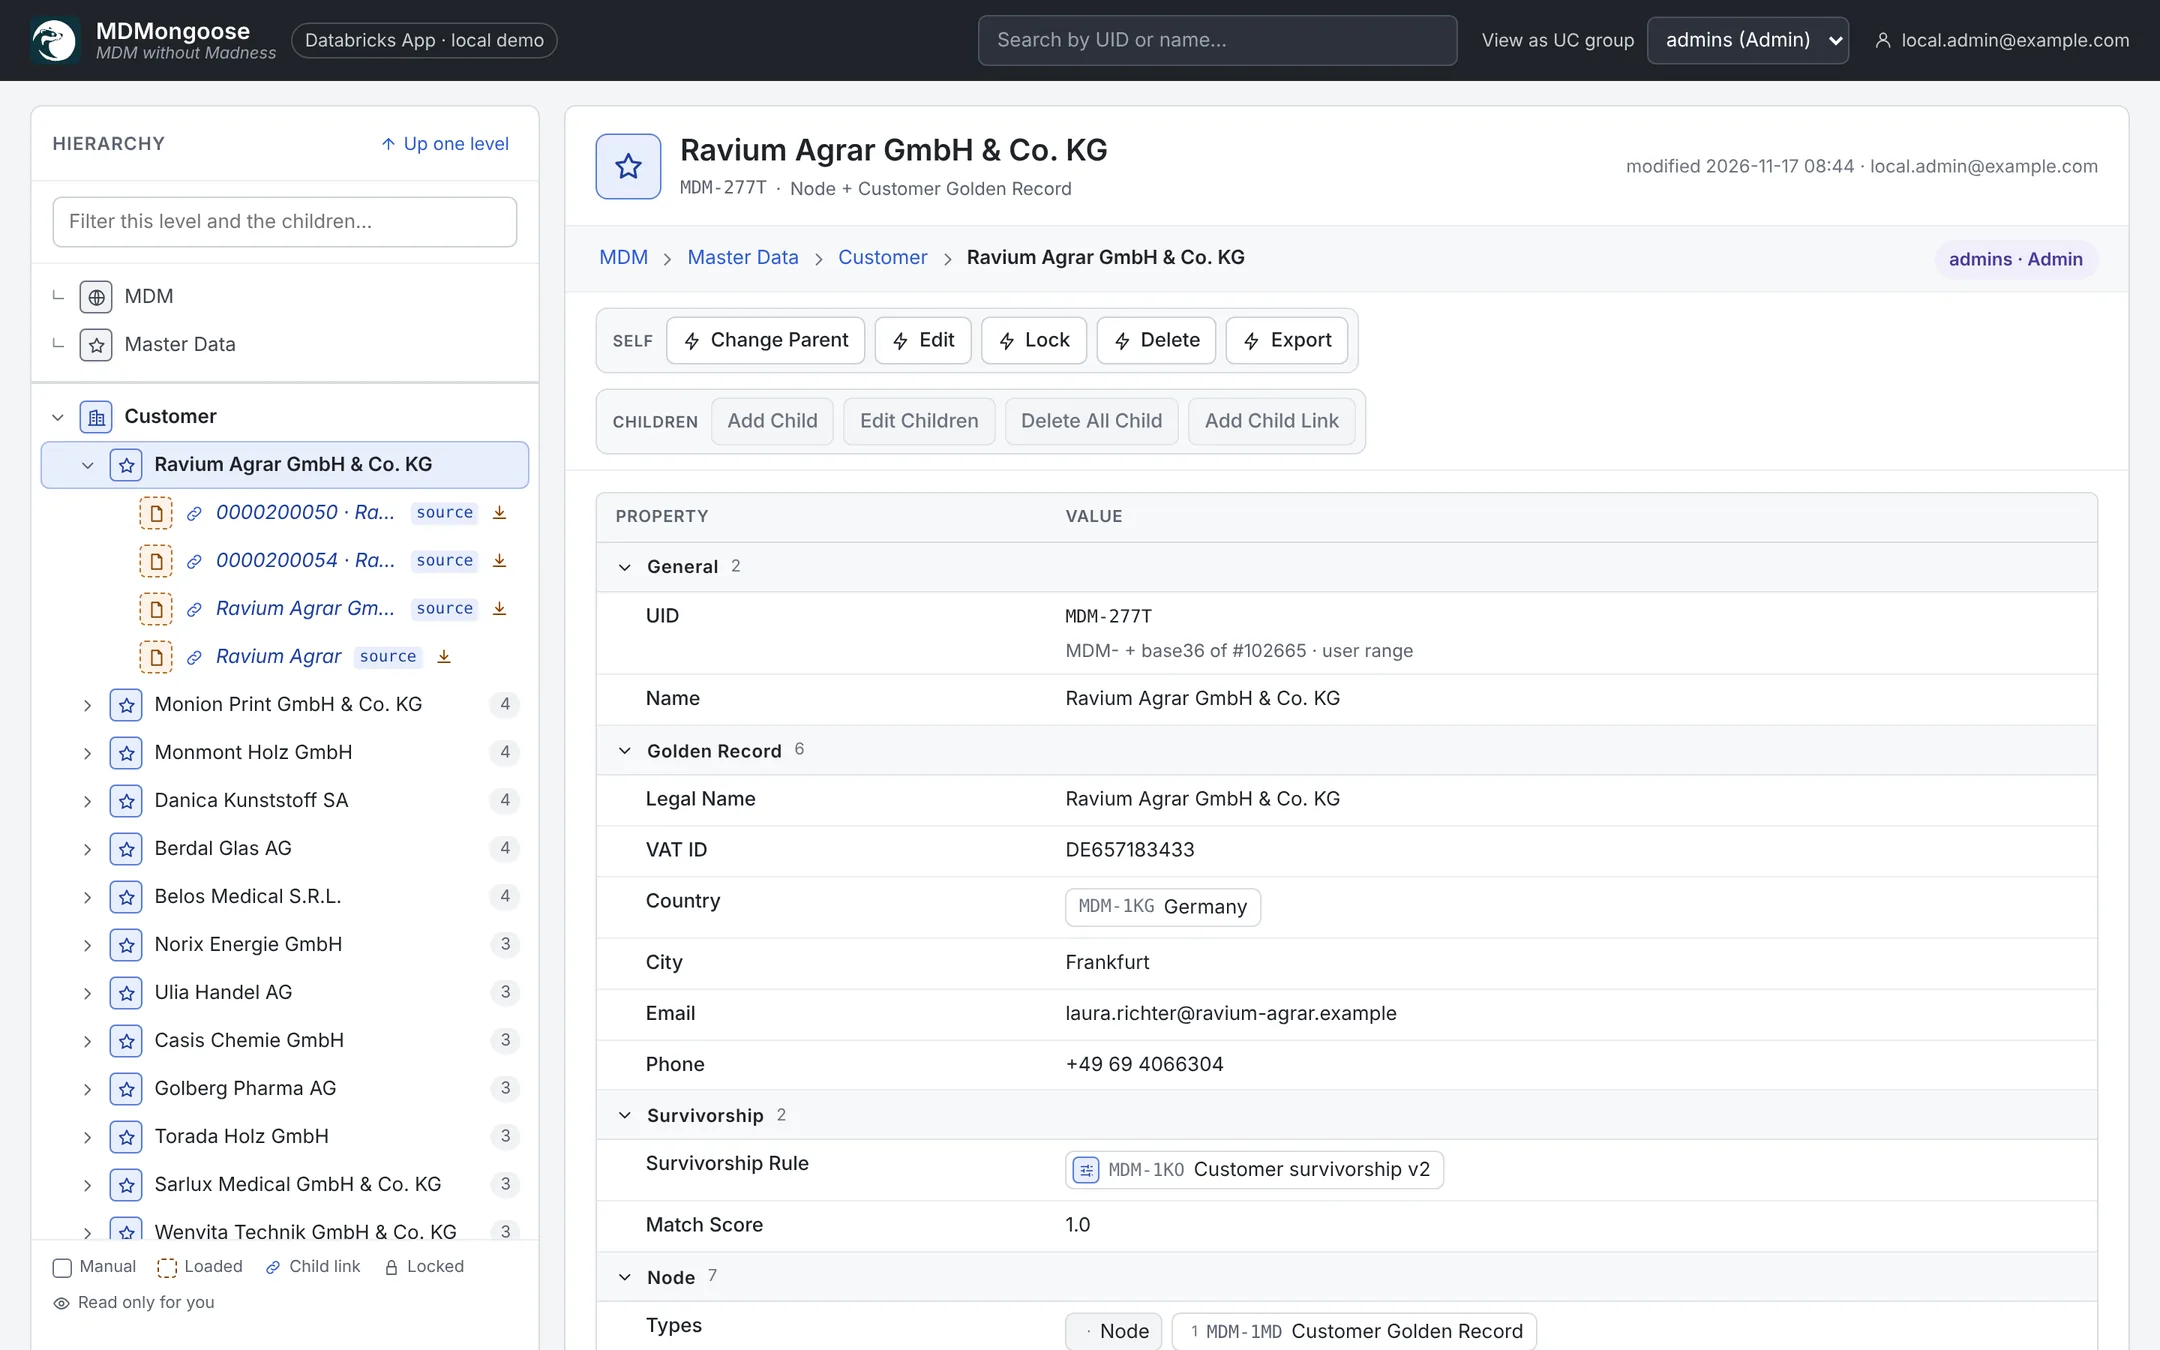
The screen at a glance
| Area | What it does |
|---|---|
| Header | Search by UID or name across the whole hierarchy. Admins can switch View as UC group to see the app as another group. |
| Hierarchy (left) | Up one level, a filter, the path above the parent, then the parent, the current level and the children of the selected node. |
| Properties (right) | The node's name, UID and types; the breadcrumb and the permission you have on it; the action boxes; then the properties grouped by Group. |
Navigating the hierarchy
- Click a node to select it; its children open below it. The path above the parent stays visible as a flat list — click any entry to jump there.
- Filter searches the current level and all children of the selected node, by name or UID, on the server — not only the rows you have loaded.
- Long levels show 40 rows and a Load next 40 link with the count, for example 40 of 831.
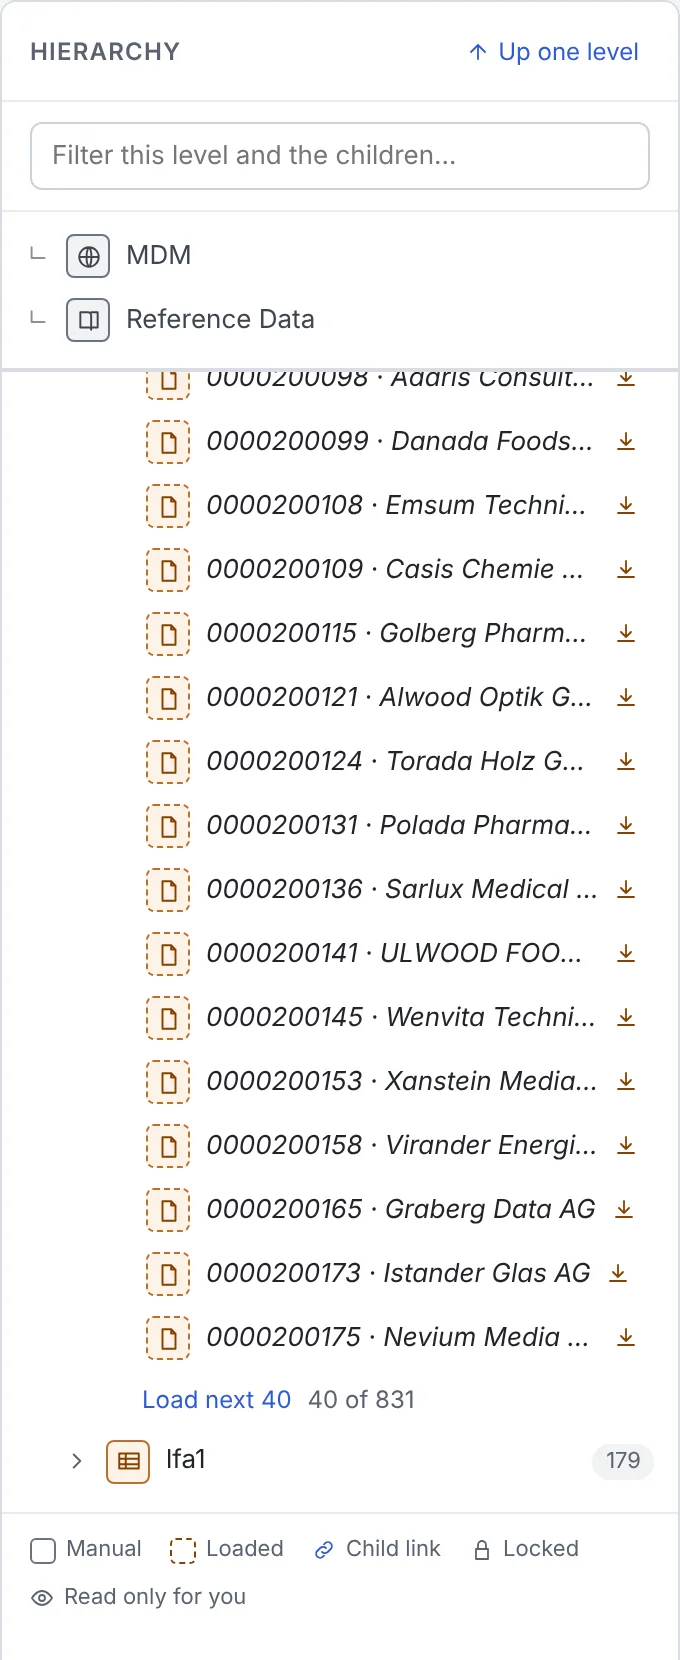
Markers on a row: a dashed orange tile = loaded from a source; a link icon = child link (with its link type); a lock = locked; an eye = read-only for you; the number at the right = count of children.
Levels you visited and the properties of the rows on screen are kept in the browser. Going back is instant; the app refreshes the data in the background.
Reading properties
- Properties are grouped: General (UID, Name) first, then the groups of the node's types, then Node (Types, Parent, Origin, Icon, structure rules) and Governance (Owner, Steward, Locked). Click a group header to collapse it.
- Click a property row to see its PropertyType, the NodeType(s) that define it (click to open them) and the UserDefined checkbox.
- Links and enum values are chips: click one to open the node it points to.
- Steward shows the effective permission of every UC group on this node and where it comes from.
- A pencil icon marks a UserDefined value — loads and survivorship will not overwrite it.
Actions
The actions of a node are boxed by group:
| Group | Actions |
|---|---|
| Self | Change Parent, Edit, Lock / Unlock, Delete, Export |
| Children | Add Child, Edit Children, Delete All Child, Add Child Link |
| Load (Table nodes) | Load Childs, Configure Load |
| Survivorship (Master Data nodes, rules) | Refresh Golden Records, Edit Rule |
| Export (Export nodes) | Run Export |
Each action has a Required Level — from Reader for Export to Manager for adding, moving and deleting. A greyed-out action tells you why on hover — for example locked or needs Manager — you have Modifier. The pill next to the breadcrumb shows your level on the node. See Security.
Editing a node
- Click Edit. The values become editable and Cancel / Save appear in the action row.
- Change values. Enum and Link fields offer a picker; arrays let you add, reorder and remove items — see Enum, Link and Array.
- Click Save. The properties panel shows Saving… until the change is stored.
Editing a value that came from a load or a golden-record refresh marks it UserDefined. Uncheck UserDefined (click the property row) to let the next automatic update refresh it again.
Dialogs
Dialogs open over the screen and block the page behind them until you close them. Esc closes the top dialog (inside a text field it first leaves the field). A Loading… or Saving… layer shows while data arrives or a save runs.
| Dialog | Page |
|---|---|
| Add Child, Add Child Link, Delete, Change Parent | Modifying data |
| Edit Children | Edit Children |
| Configure Load, Load Childs | Importing data |
| Edit Rule | Survivorship rules |
| Refresh Golden Records | Master data records |
| Export | Exporting to CSV and Excel |
| Run Export (Export nodes) | Exporting with materialized views |